How to create Auto Shapes in PowerPoint
Auto shapes are building blocks of a diagram or graphic. In this article we will learn how to create Auto Shapes in PowerPoint.
Finding the Auto shapes menu:
To create an Auto Shape, go to the ‘Home’ tab in PowerPoint. In the ‘Drawing’ group you will find the menu as follows:
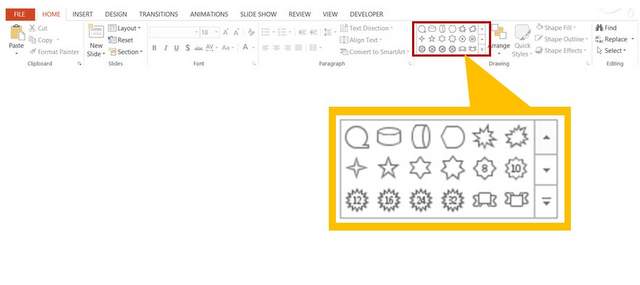 Autoshape Menu
When you click on the down arrow button to open the menu you will find the various types of Auto Shapes as shown below:
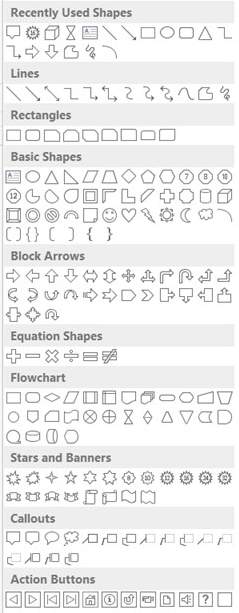 All Shapes in PowerPoint
The menu also includes Lines and Action buttons.
Creating Auto Shapes in PowerPoint:
To create an auto shape, go to the Auto Shapes menu and click on any of the shapes. Your cursor will turn into a cross. When you click on the slide, the point becomes the anchor for one corner of the shape. When you drag the cursor and release it, the release point becomes the other anchor point of the shape and the shape gets created.
 Drawing an Auto shape
All auto shapes have their own rectangular frame around them (but for the ‘lines’ type):
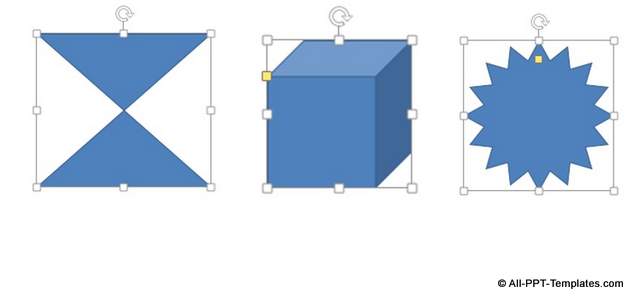 Frame Around Each Auto Shape
If you are not happy with any of the standard auto shapes, you can create them from scratch using Free form tools:
 Custom Auto Shape Tools
It is possible to create almost any shape using these basic tools.
Default characteristics of an auto shape:
By default any auto shape has a blue fill and blue outline. The colors of the fill and outline are slightly different as shown here:
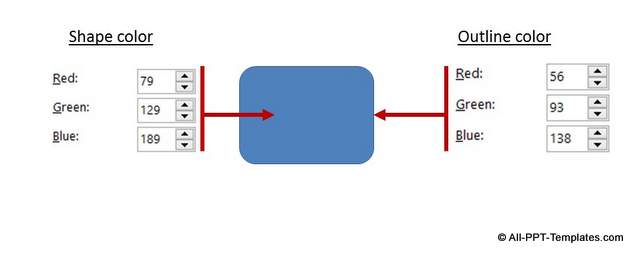 Fill and outline Defaults from Auto Shape
You can change the shape fill color and outline fill color with a color of your choice.
When you click on an auto shape, you will find handles that allow you to resize, rotate or manipulate shape as shown below:
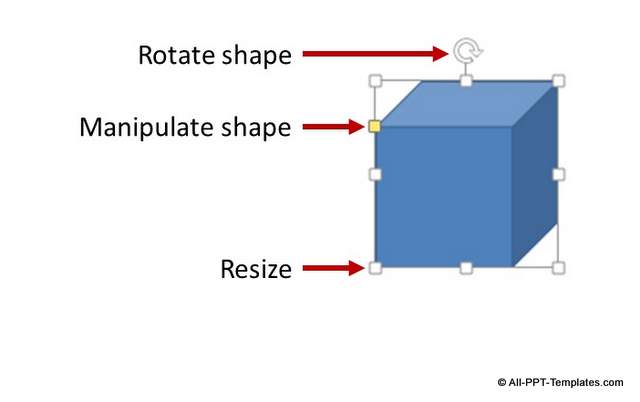 Options To Manipulate PowerPoint Auto Shapes
Related: Create Custom Flowcharts
Editing the shapes:
When you right click on an Auto Shape you will find the option to ‘Edit Points’. You can drag the points to alter the default shape to suit your style.
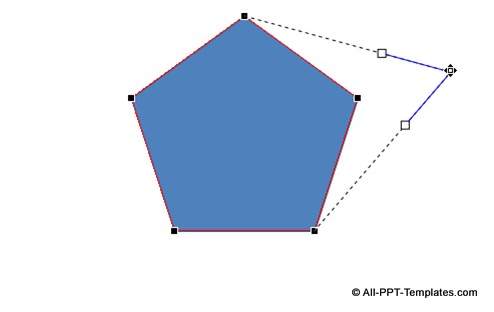 Editing Auto Shape
Merging shapes:
You can merge two or more auto shapes to create your own Auto Shape.
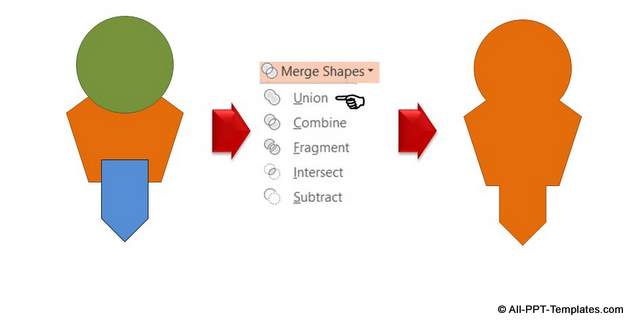 Example of Merging Auto Shapes
Other ways to work with auto shapes:
You can arrange Auto Shapes in different layers. You can fill them with pictures. You can write text inside them. You can animate them. You can group two or more auto shapes. Since the number of things you can do with Auto Shapes are too many to be covered in a single article, we will explore each of the topics in detail in separate articles.
Another way to impress your audience:
Knowing how to work with auto shapes to create high quality graphics and diagrams is a sure way to impress your business audience. However, it takes a lot of time to create high quality graphics from scratch.
Creating custom layouts is one way to impress your audience. Another way is to use professional quality business graphics and diagrams for your business slides. However, it takes a long time to create high quality graphics and diagrams from scratch. As a busy business presenter, you may not have the time to polish the look and feel of your graphics every time.
That is why we came up with our PowerPoint Essential Charts Pack for busy business presenters like you. The pack has 700 templates you can use in business presentations. Just choose the template that matches your thought. Replace the sample text with your own text and your business slides get ready in no time. Creating professional quality business slides has never been easier.
Here are some examples from this pack of how auto shapes can be used creatively:
Example 1: Call out shapes used to show core message and supporting points
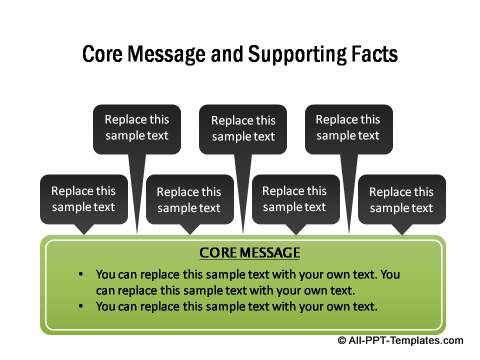
Source: Callouts section of Essential Charts Pack
Example 2: Diagram created by manipulating existing Triangle shape
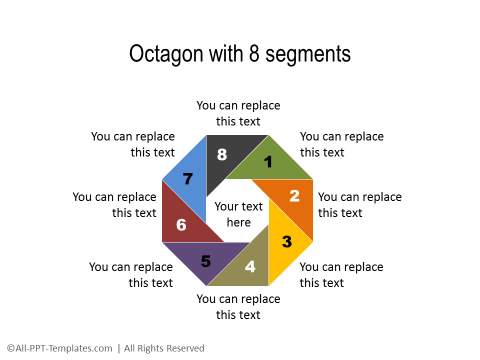
Source: Shapes Section of Essential Charts Pack
Example 3: Diagram created by merging and fragmenting different shapes
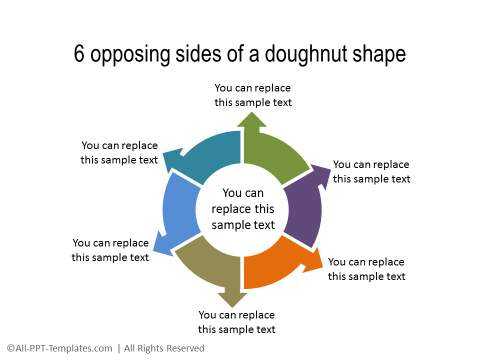
Source: Shapes Section of Essential Charts Pack
All these examples are taken from the Essential Charts Pack.
Related Posts
Top of Page : Auto Shapes In PowerPoint
Main PowerPoint Tutorials Page


New! Comments
Leave me a comment in the box below.