How To Custom Master Slide Layout in PowerPoint
In this tutorial you will learn how to custom master slide layout in PowerPoint to standardize the look and feel of your special layouts.
What is the use of Customizing Master Slide Layout?
Sometimes when you create slide designs for your business presentations, you may need certain special layouts to showcase your product range or items. Creating these master layouts are useful when:
- You will be using the same layout again and again or
- When a number of people will be working on the same presentation.
These layouts help create a consistent look and feel required a professional presentation. For example, you may need a layout like the one below that contains images and blocks of bullet point text:
Since you would be using the layout over and over, you may want to have the layout as part of the Office Theme Layout options in PowerPoint.
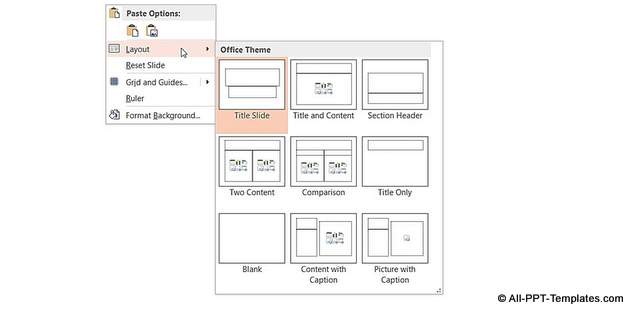 Layouts Available Readily in Office
Since the layout is not available as a ready option, you may need to create one for your use. In this article, you will learn the step by step process to create a custom layout in PowerPoint.
Step 1: Create a new layout
Go to View -> Slide Master option in your main menu ribbon
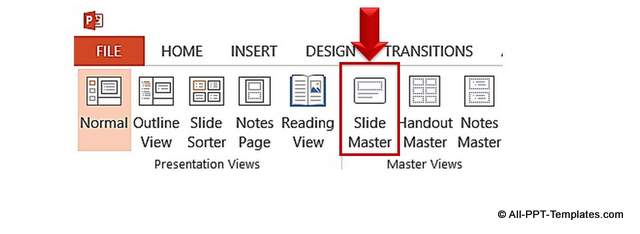
Go to ‘Insert Layout’ option as shown in the screenshot below:
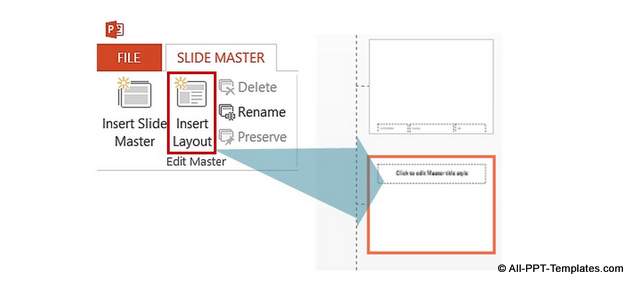 Menu to Insert New Layout
Step 2: Rename the Layout
The next step is rename the layout to represent the layout you intend to design:
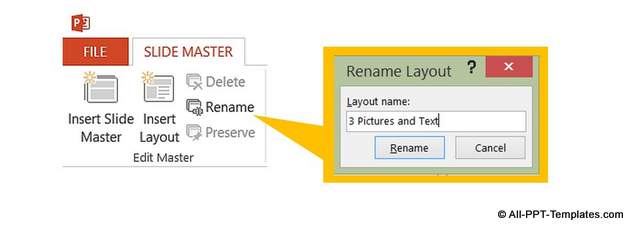 Rename Slide Layout Option
In our case, we would like to call out
custom layout as ‘3 Pictures and Text’. Following a proper naming convention ensures that you can insert these layouts quickly when you need them.
Step 3: Insert the placeholders to design your Master Layout
When you click on the option called ‘Insert Placeholder’ you will get a list of placeholders to choose from. You can pick the right kind of placeholders and lay them out to create your Master slide layout as shown below:
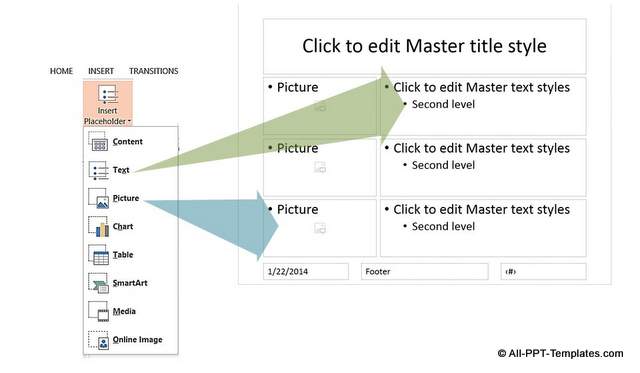 Adding Layout Placeholders
Now, close the Slide Master View. The option is available in the Slide Master Tab in the menu.
Step 4: Apply the layout
The last step is to select a slide to apply the newly created custom master slide layout. For this, right click on the slide and go to ‘Layout’ option. You will find your custom layout (3 Pictures and Text) available as one of the options:
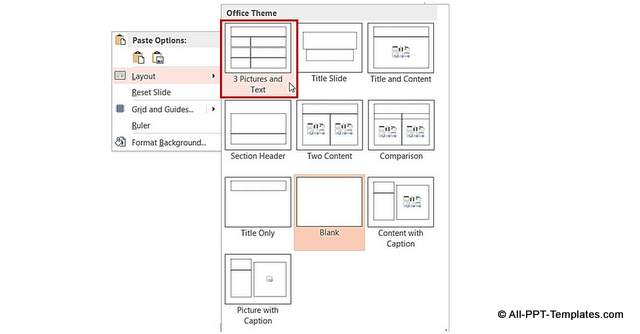 Inserting the Newly Created Slide Layout
This is how the layout we just created will appear on your slide:
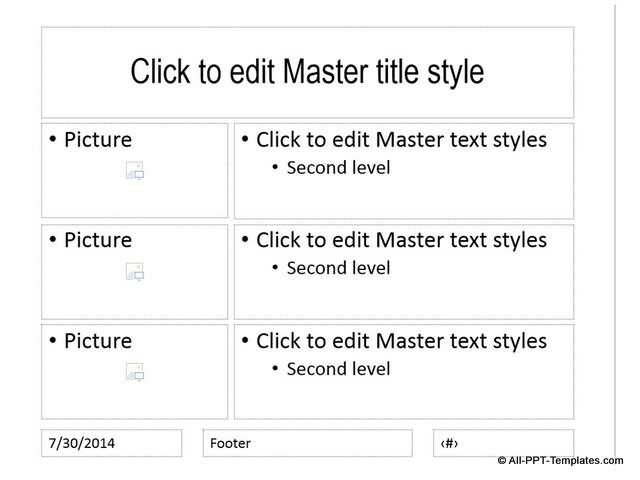
Click on the relevant placeholders to complete your slide design as shown below:
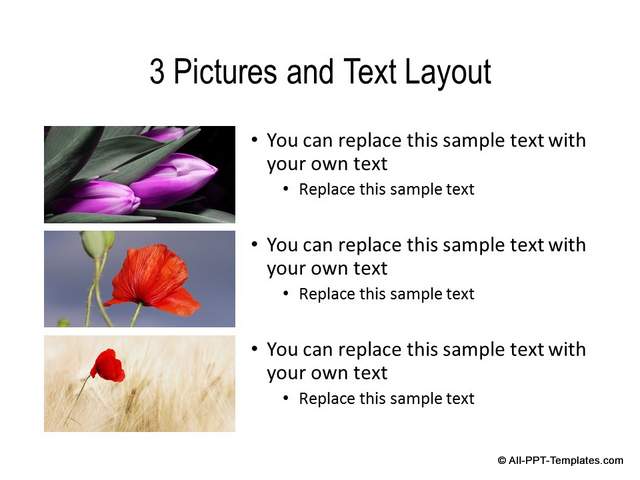
Your custom slide design is ready.
Another way to impress your audience:
Creating custom layouts is one way to impress your audience. Another way is to use professional quality business graphics and diagrams for your business slides. However, it takes a long time to create high quality graphics and diagrams from scratch. As a busy business presenter, you may not have the time to polish the look and feel of your graphics every time.
That is why we came up with our 700 PowerPoint
charts and diagram templates collection for busy business presenters like you.
All our templates are 100% editable. Just choose the template that matches your
thought and replace the sample text with your own text. Your business slides
get ready in no time. Creating professional quality business slides has never
been easier. Browse through the templates and download them here.
Related Posts
Top of Page : Master Slide Layout
Main PowerPoint Tutorials Page
