How to resize Auto Shapes Menu in PowerPoint
Found Your Auto Shapes Menu blocking your slide content? Here is how to resize the menu box and solve this problem.
Blocked View of The Slide Area
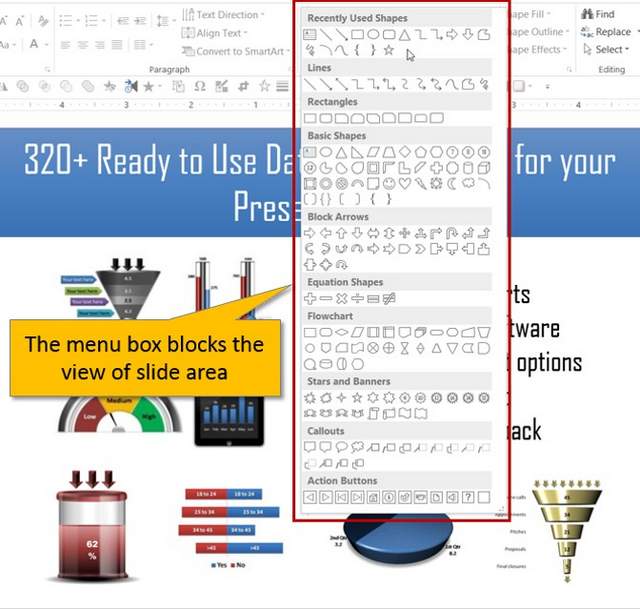
Sometimes when you click on the drop down menu of auto shapes, you will find that the length of the menu box blocks the view of slide area. Take a look at the following scenario:
 Blocked View of Slide Area
This blocked view makes it difficult to create new diagrams easily. What if you could resize the dimensions of Auto shapes menu box, so that you can pick the tools with ease, while maintaining a clear view of slide area? In this article, we will show you how to do it easily.
Drag the corner handle to resize the menu box:
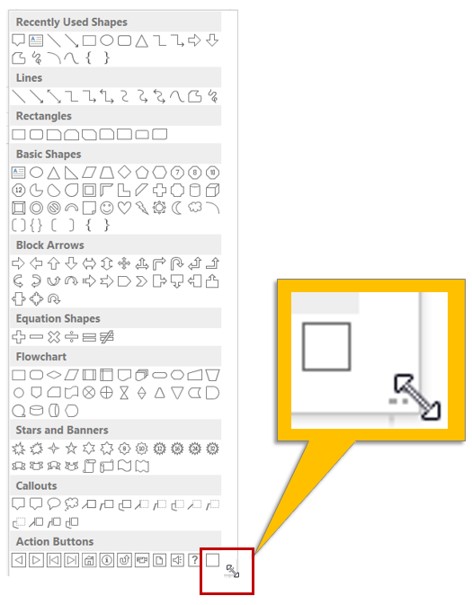
When you move your cursor to the bottom right corner of menu box, you will find the cursor turning into a double headed arrow as shown below:
 Autoshapes Menu Box Handle
You can hold the handle to resize the dimensions of menu box to your liking as shown below:
 Resized Auto Shapes Menu Box
You can browse through the shapes using vertical scroll bar. This is a much better way to work with the auto shapes menu.
If you liked this post and would like more tips and tricks to use PowerPoint more effectively, please sign up here to get FREE tips in your inbox.
I hope you found this tutorial useful. You can find many more such PowerPoint tricks in our tutorials section.
Please do share your comments below if you found this tutorial useful.
Related Posts
Top of Page : Insert PowerPoint Symbol
Main PowerPoint Tutorials Page


