How To Customize PowerPoint Ribbon
One of the pet peeves of PowerPoint 2007 was you had to move between tabs too often to create a presentation. Unless you were a memory champion, you would spend a lot of time searching for the commands buried deep inside layers of pop up and drop down menus. Not anymore. Hurray!

From PowerPoint 2010 onwards you can create your own tabs. You can place all the commands you commonly use in one tab and spend more time working on your slides than searching for commands. In this article, we will see how to customize your PowerPoint ribbon in a step by step way.
Finding the option to customize PowerPoint ribbon:
You can right click anywhere on the existing PowerPoint ribbon and you will get the following options:
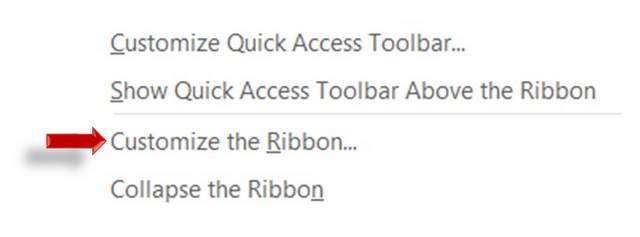 Option to Customize Ribbon
When you click on ‘Customize the Ribbon…’ option, the following menu pops out. You can see a list of commands on the left side of the pane. On the right, you can see the list of Main tabs on the ribbon.
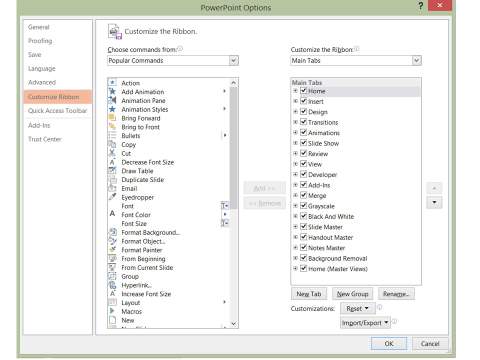 Options to Customize Ribbons
When you expand the collapsible titles of the main tabs, you can see the ‘groups of commands’ as shown below:
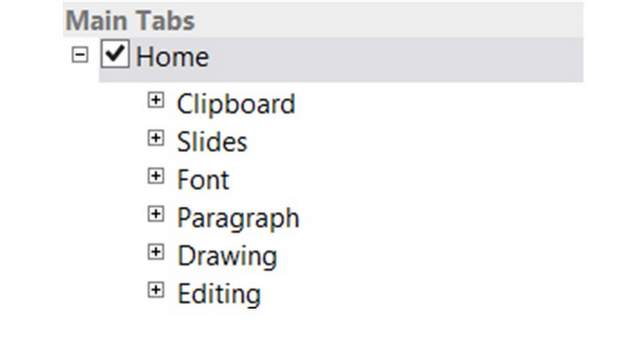 Main Tabs
In the bottom right corner of the pane, you will find options to create a New tab, New Group or Rename a tab.
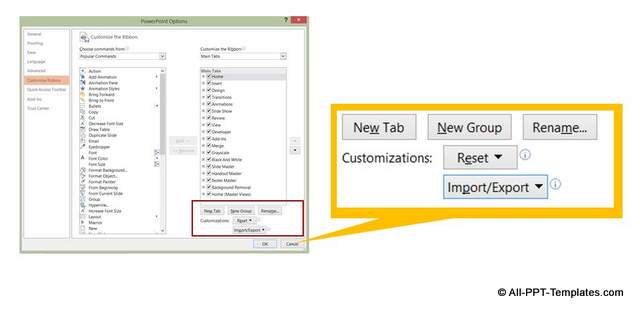 Options to Create New Tab
Creating a Custom Tab:
Click on the ‘New Tab’ option. A new tab gets added to the list of Main tabs. You can use the ‘Rename…’ button to rename the ‘New tab’. Let us call this tab as ‘Frequent’. There is a ‘New Group’ include in the tab by default.
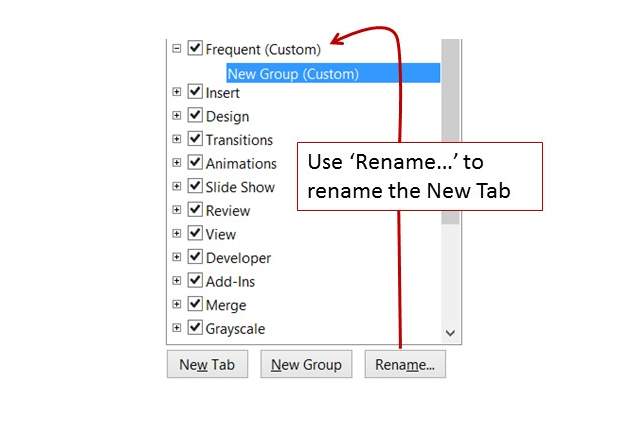
You can right click on the New Group and choose ‘Rename’ option:
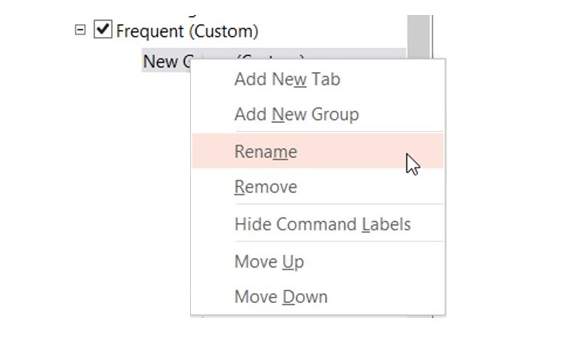
Here, you not only can add a display name for the group but also can add an icon to represent the group (The icon will appear when there is not enough width in the window to display the group). Let us call the new group as ‘Common’.
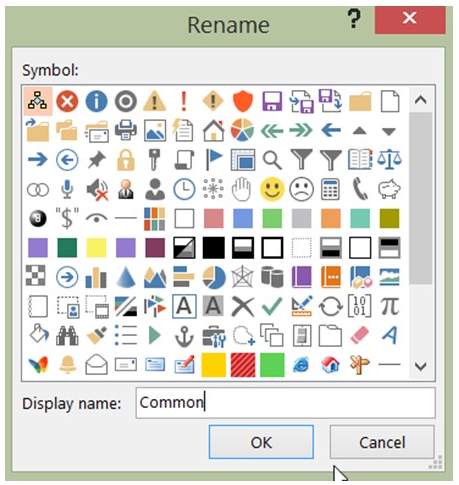 Icon to Display with Tab Name
Remember that you can add as many groups as you need by clicking on ‘New Group’ button to organize your commands.
Adding commands to the Group:
Here are the steps to add commands to the group:
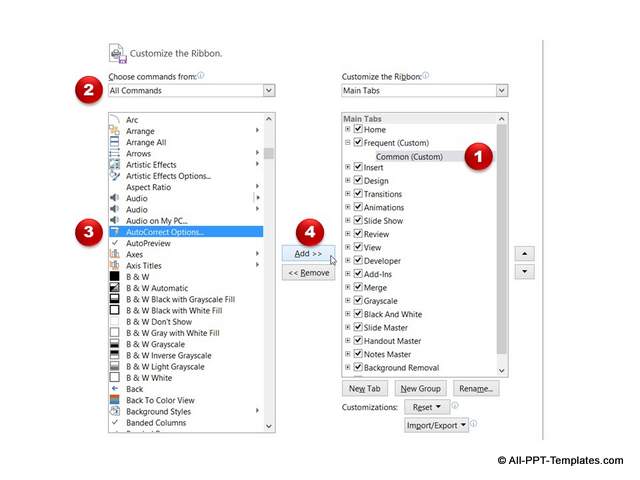
- Click on the group you want to add the commands to
- Make sure that you choose ‘All commands’ option to access all the commands you may want to add to the group
- Pick the command you want to add
- Click on ‘Add’ button to add the command to the group. Later if you choose to remove any command from the group, you can always click ‘Remove’ button after selecting the relevant command from the group.
Resetting the customizations:
PowerPoint 2013 gives you total freedom to rename any tab (including the in-built ones). You can add a group to any of the existing tabs. You can add any command to any of the groups as long as the group is created by you.
Sometimes, you may want to reset some of the customizations you made. In such cases you have the option to Rest only the selected ribbon tab or Reset all customizations.
You also have the option to export all the customizations from one computer to another computer easily.
That is all the things you can do to customize a new PowerPoint Ribbon and save time in creating presentations. I hope you found this tutorial useful. You can find many more such useful PowerPoint tricks in our tutorials section.
Please do share your comments below if you found this tutorial useful.
Related Posts
Top of Page : PowerPoint Ribbon
Main PowerPoint Tutorials Page
