2 Easy Ways to Deal With large images in PowerPoint
Struggling with managing large images in PowerPoint? In this article you will find 2 easy ways to control outsize images and show them properly in your slide.
If you want good images with high clarity, they usually are fairly large and heavy. When you stick them on your slides, they go way out of slide boundaries. They bloat up the file size too. In this article, you will learn how to manage such large images easily.
Method 1 : Resize Photos by Shrinking
Step 1: Stick the large image on your slide
The first step is to stick the large image you find from stock photo sites or public domain to your slide using Insert -> Pictures option.
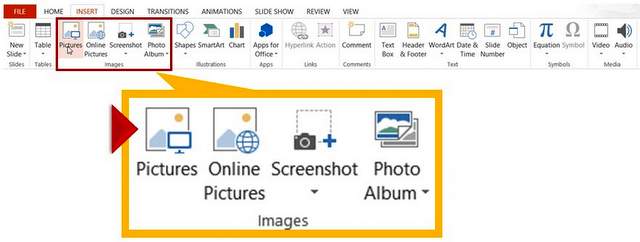 Insert Picture Options in PowerPoint
Step 2: Resize the image
You would observe that the picture is so large that you only see a small portion of the image on your slide as shown below:
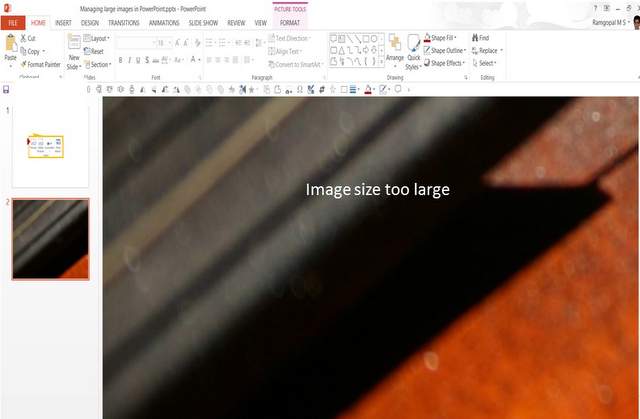 Large Image in PowerPoint Slide
There are a couple of ways to resize the picture to fit within the slide boundaries.
Go to ‘Zoom’ tool at the bottom ribbon in PowerPoint as shown below:
 Reduce Slide Zoom in PowerPoint
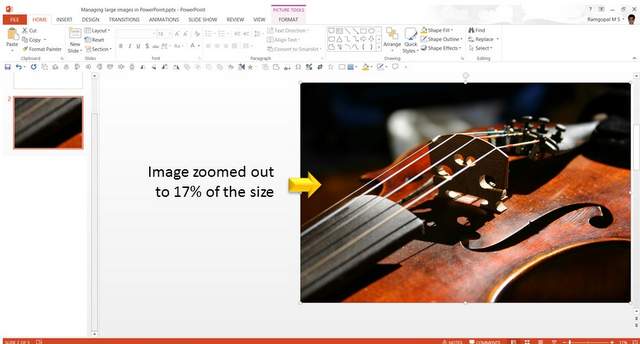
Click on the ‘-‘sign or ‘Zoom out’ sign till you see the entire picture. You can also do this by moving the slider to the left. In the following case, we have zoomed out the image to 17% of the size, so we could resize the image:
Now, click on one of the corners. While holding the ‘Shift’ key pull in the image to shrink it to fit the slide:
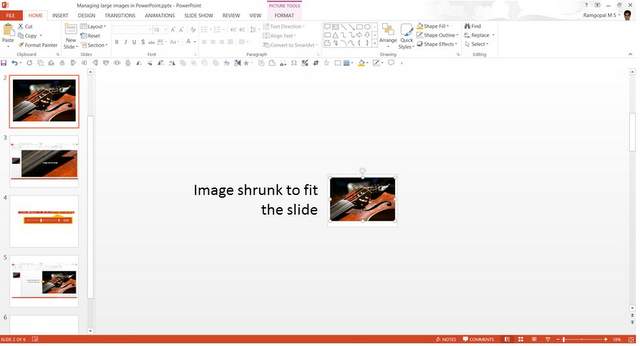 Image Shrunk to Fit Slide
Related: More uses of the Shift key you didn't know
Method 2 : Resize Photos by Cropping
Select the picture. Go to ‘Format’ tab. Change the Height and Width to 7.5 and 10 inches respectively.
 Adjust Pictures by Cropping
If you can’t find the picture in the slide area, you can zoom out to locate the picture and move it to the slide area.
Reducing the file size:
Just to make sure that the picture stays in the same dimension and to keep the file size low, select the picture. ‘Cut’ it and paste it back as ‘PNG’ image using ‘Paste special’ option (You can access Paste special option using ‘Ctrl + Alt + V’ combination).
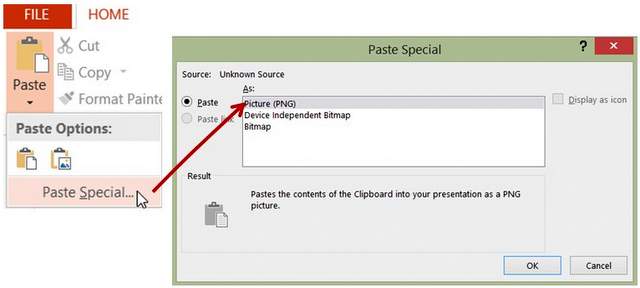 Paste Special to Reduce Picture Size
That is how you manage the size of very large images in PowerPoint.
Another way to impress your audience:
Using nice looking banners on your website or on your eLearning platforms is one way to impress your audience. Another way to impress them is to use high quality graphics and diagrams for your business presentations.
However, it takes a lot of time and effort
to create professional quality business graphics from scratch. That is why we came
up with our PowerPoint Essential charts collection for busy
business presenters like you.
All the templates in our collection are fully editable. Just choose the template that matches your thought and replace the sample text with your own text. Your business slides get ready in no time. Why waste time creating your graphics and diagrams from scratch, when you have such a high quality solution readily available?
We hope you found this article useful. If so, please share this article with your friends and leave your comments below
Related Posts
Top of Page : Deal with Large Images
Main PowerPoint Tutorials Page
