Using Different PowerPoint line types
There are multiple options for Lines in PowerPoint. They all work differently and serve different purposes. In this article, we will explore the different line types in PowerPoint and how to use them.
Types of Lines:
There are five distinct line types under ‘Lines’ option in Auto shapes menu.
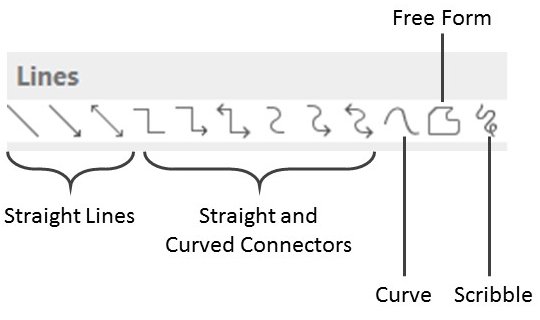 PowerPoint Lines Menu
For all the line types you have the option to change their color, weight and Dashes type as shown below. You can also add different types of arrow heads to lines (‘Free Form’ tool is an exception).
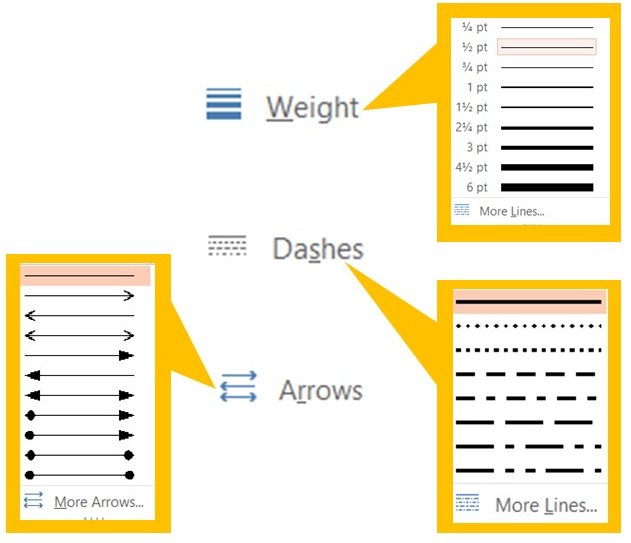 Line Settings
Once you draw a line, you just need to go to ‘Shape Outline’ option in the ‘Drawing’ group on Home tab. The drop down menu opens up as follows:
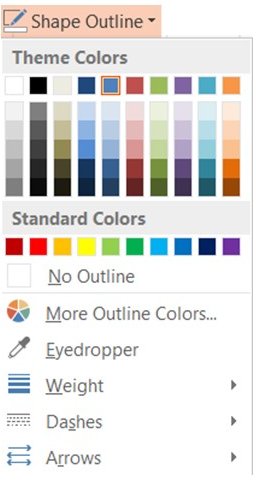
Make the alteration to the line to suit your specific needs. Now, let us see how to use the different line types.
Type 1: Straight Lines
Select one of the ‘Straight Line’ options from Auto Shapes menu. The cursor turns into a ‘+’. Click anywhere on the slide to anchor the starting point. Click again to mark the end point of the line. Your straight line is done.
 Lock Drawing Object Menu
You can ensure that the line is absolutely straight by clicking on the Ctrl key when drawing the line. Find more uses of the Ctrl key here.
Type 2 : Straight and Curved Connectors
Pick one of the ‘Connector Lines’ from auto shapes menu. Now, when you hover over an auto shape, you can see dark squares along the edges. They are called connector points. Click on one of the squares to anchor the starting point of the line. Click on a connector point on another shape to mark the end point of the line. Now, both the shapes are connected. You can adjust the angle and shape of the connector by moving the yellow handle as shown below.
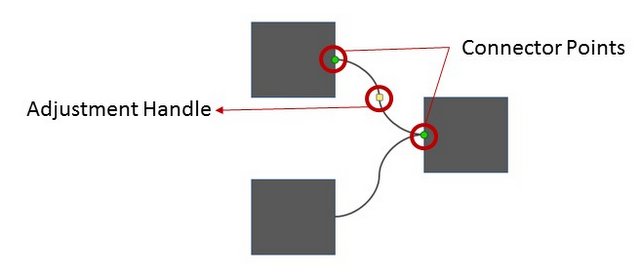 Drawing curved lines
Type 3: Curve Line
Select the ‘Curve’ tool from auto shapes menu. Click anywhere on the slide to mark the starting point. Click again to create a second point. Click again to create another point and so on. When you want to finish drawing the line, double click. To edit the line, right click and go to ‘Edit Points’. You can adjust the shape of the line by dragging the editable points along the line.
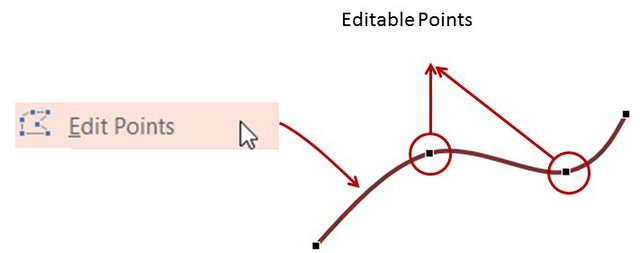 Editing Curve line
Type 3: Free Form Line
Free Form works the same way as a curve. Every point you click becomes an anchor point. To finish the line you double click. When you click on the starting point, the path gets closed and the shape gets filled with default blue color.
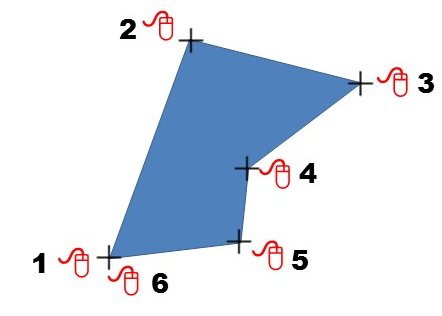 Free form shape PowerPoint
Unlike a curve, the segments between the points are straight lines instead of curves.
Type 5: Scribble
To draw a scribble line, pick the tool from auto shapes menu. The cursor turns into a pencil. Click anywhere on the slide to anchor the starting point. Hold down the mouse button and move the mouse to create the line. When you release the click the line segment ends.
 Scribble tool
Those are the ways to create the various line types in PowerPoint.
Related Posts
Main PowerPoint Tutorials Page
