Understanding PowerPoint 3D Bevel
In this article you will find how to use the PowerPoint 3D Bevel options to create stunning diagrams for your presentations. Simply playing with the top bevel and bottom bevel can produce a range of different shapes.
3D formatting capabilities of PowerPoint are probably only of the least understood and the most remarkable aspects of the program. A simple diagram can look quite impressive when you apply 3D formatting to shapes.
Here is an example. Take a look at how a 2D circle gets transformed to a button or a disc with 3D formatting.

While there are many aspects to 3D formatting, in this article, we will explore the options under Bevel effects in PowerPoint.
Accessing 3D formatting options:
Draw any object using auto shapes. To access 3D Formatting options, right click on the shape and go to ‘Format Shape’.

If you are using PowerPoint 2007 or 2010 version, a dialog box pops out as shown below. Click on the 3D format option.

If you use PowerPoint 2013, a pane opens up on the right. Click on the 3-D Format under ‘Effects’ option in the pane.

Best way to understand the impact of Bevel effects:
You can apply Bevel effect to an object in 2D. The impact is not too significant as shown below:

Let us apply a bit of 3D perspective, depth and shadow to the base shape to see the real impact of the various bevel effects. Here is how you set up the base shape:
Right click on the circle and go to Format shape. Go to 3D Rotation -> Perspective -> Perspective relaxed:

Go to 3D format option and a depth of 15 points

Go to Shadow option and apply the preset under ‘Outer’ called ‘Offset Center’, Increase the size of the shadow to 110%.

Here is how the various Top Bevel presets would look when applied to the base shape you just created:

Going beyond the defaults in PowerPoint 3D Bevel
It is not necessary that you stick to the default setting in a preset. You can always increase the width and height of the Top bevel to get some interesting results as shown below:

The same way, you can apply different bottom bevel presets and adjust the width and height to create interesting effects as shown below:

So, when creating your 3D diagrams, experiment with different settings to see the effect that suits your requirement the most.
Quick Help Guide Infographic for 3D options in PowerPoint
To make it easy for you to find which 3D option to use when you are creating a 3D diagram in PowerPoint, we'd like to share this useful infographic. It summarizes the contents of the article you have just read and provides a quick reference guide. Just right click on the infographic and Save Image As... to save the helpful guide to your desktop.

Here are some creative examples of how 3D bevels can be used and integrated into a diagram seamlessly :
Examples of using 3D Bevels in Diagrams
1. 3D Scales created with formatting options in PowerPoint
In the following diagram we have applied 3D bevel options to a basic rectangle to create the scales. The glossy balls are created with color gradient and transparency effects.

Source: PowerPoint Comparisons from All Inclusive Charts Pack
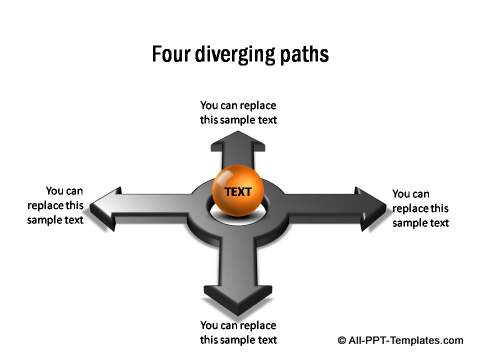
2. Formatting options applied to Arrows to create a roadmap
Shadow, bevel and perspective options are applied to create these diverging arrows for a useful roadmap diagram.
Source:PowerPoint Roadmap templates from All Inclusive Charts Pack
3. Multiple 3D discs to create a step diagram
We have used multiple 3D discs of the type created in this tutorial. The discs are piled on top of each other to create a pyramidal structure.

Source: Steps Diagrams from All Inclusive Charts Pack
These are some of the examples of diagrams you can create using 3D bevel options.
We hope you found the tutorial and examples useful and can apply the learning to your next presentation.
Another way to impress your audience:
Applying the right Bevels to 3D shapes is one way to create impressive slides. Another way to impress your business audience is to add professional quality charts, diagrams and graphics to your slides.
However, if you are a busy business presenter, who can’t afford to waste time building and polishing your graphics and diagrams from scratch, you can always take a look at our All Inclusive Charts Pack for PowerPoint with 1900+ templates.
All the templates are 100% editable. Just choose the template that matches your thought and replace the sample text with your own text. Your business slides get ready in no time. Creating professional quality business slides has never been easier.

Related Posts


Top of Page : PowerPoint 3D Bevel
Main PowerPoint Tutorials Page


|
Contact Us |
|

Copyright 2011-2026 All-PPT-Templates.com. All rights reserved.
Disclaimer: PowerPoint is a registered trademark of Microsoft.
All PPT Templates- the website, products or services are NOT affiliated with, sponsored by, or endorsed by Microsoft.