4 Habits for Professional Design in PowerPoint
In this article you will learn 4 good habits that lead to precision design in PowerPoint. Whether you are placing shapes, text boxes, pictures or graphs on your slides, you need to follow these 4 design rules.
The difference between slides that look amateurish and the ones that look professional is – the extent of precision in placement, size, alignment, angle of rotation etc. of the elements on the slide. In this article, we will explore some of the simple ways you can make your slide design look precise.
‘Eye balling’ is a lazy way to design slides:
Many presenters rely on just their eyes to design their slides. They feel it is alright to have slight deviations here and there. The problem is – small deviations in the normal view get magnified on a projector screen. What is more, those deviations convey a sub-conscious message that you don’t care for ‘details’ in your work. To avoid the issue focus on the following elements when designing your slides.
Habit 1 : Use 'Size' pane to resize objects:
When you want to expand or shrink two more pictures or shapes to the same size, select them and go to ‘Format’ tab in PowerPoint ribbon. Make the adjustments to height and width in the Size group.

This ensures that all the pictures have the same dimension, thereby bringing consistency to slide design. Note that you can also resize objects using ‘Percentages’ instead of using pixels.
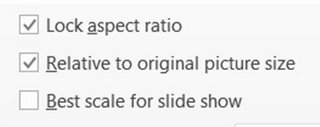
In any case ensure that the Lock Aspect Ratio option is ticked. When you shrink or expand objects this will ensure that the picture/ object scales relative to the original size ( or of the object in the given instance).
You can also use ‘Best scale for slide show’ option to match the resolution of images with the resolution of your slides.
Example of Resizing Image
In the template below, we have selected the pictures and selected Format Picture tab. By adjusting the Scale Height and Width option ( keeping Lock aspect ratio & Relative to original Picture size options ticked) we easily resized ALL the images at the same time and in the same proportion.

The above template is taken from the Image layout section of Essential PowerPoint charts pack. You can find more such templates here.
Example of Resizing many shapes
Here is an example of the resizing option used for shapes. This is a complex template with multiple shapes, grouped objects and text. We have selected all objects on the slide for resizing:

To make the 2 sets into 2, we used the resize option to reduce the % size of the shapes from 100 to 75%. Then we copied and pasted the first set of shapes. Note that in such grouped objects, the size of text is not resized automatically. You can resize text using the Font size options.

The above sample template is from Comparisons Templates section of Essential PowerPoint Charts Pack.
Habit 2. Use ‘Smart Guides’ or ‘Align tool’ to align objects:
PowerPoint 2013 makes it easy for you to align objects with smart guides. This saves a ton of time in achieving professional design in PowerPoint.
In case you use 2007 version of PowerPoint make
sure that you use Align and Distribute functions every time you want to line up
objects. It is really worth spending the time to Align the objects properly. You can also enable the Ruler and Gridlines options under View tab to assist in placing your object.
Example of how Alignment works:
In the following example you can see how alignment & distribution is displayed ( red arrows) on the go as you move an object. The red arrows shown in the example below were displayed when we moved the shape labeled "1" in the template.
We have also enabled Gridlines in PowerPoint 2013. This shows up as the layer of horizontal and vertical dotted lines in the background.

The above template is taken from the Awards section of Essential PowerPoint charts pack.
Habit 3. Use ‘Angle of Rotation’ to rotate precisely:
It is not easy to judge angles precisely with naked eyes. That is why rotating objects using rotation handles is not a good idea - especially if you want to rotate different objects on the same slide. To ensure precise rotation, right click on the object and go to ‘Size and position’ option. Enter the angle manually or increase the angle one degree at a time by clicking on the up and down arrows next to ‘Rotation’.

Related: Know more about 3D rotation options in PowerPoint
Example of Shape Rotation in Action
Here is an example of how rotation option has been used to create an interesting box of questions concept ( Questions section : Essential PowerPoint Charts Pack). Each of the question marks have a different rotation setting to create an overall effect of popping out from the cardboard box.

Habit 4: Use ‘Ctrl + Up/ Down’ arrows to nudge objects:
Keeping the ‘Ctrl’ button pressed while you use ‘Up’, ‘Down’, ‘Left’ or ‘Right’ arrows helps you to nudge objects one pixel at a time. This comes in quite handy when you want to make minute adjustments. In PowerPoint 2013 however, you don’t need to hold the ‘Ctrl’ buttons for nudging items.
Those are some of the ways to ensure that your slides look professional. Please use the comments section below if you’d like to share the tools you use to design slides with precision.
Quick Professional Design in PowerPoint
Using relevant controls to design slides accurately is one way to impress audience. Another way to impress them is to use high quality graphics and diagrams for your business slides. However, it takes a lot of time and effort to create high quality graphics from scratch.
The examples we have used in this article too are taken from Essential PowerPoint charts pack. The pack has 700 ready to use and fully editable templates for essential slides types like Agenda, Bullet Points, Callouts to Roadmap, Timelines and Thank You slides.
Just choose the templates that match your thought. Replace the sample text with your own text and your business slides get ready in no time. Creating professional quality business slides has never been easier.
You can find out more about these templates and browse the contents of the pack here.

Related Posts


Top of Page : Professional Design in PowerPoint
Main PowerPoint Tutorials Page


|

Copyright 2011-2022 All-PPT-Templates.com. All rights reserved.
Disclaimer: PowerPoint is a registered trademark of Microsoft.
All PPT Templates- the website, products or services are NOT affiliated with, sponsored by, or endorsed by Microsoft.