How To Convert a Presentation into Picture Slides And Make Them Uneditable
Sometimes when you share your presentation with others, you don’t want them to be able to edit your slides. While there are many ways to do this, like making your presentation as ‘Read only’ file, saving your presentation as a PDF file (PowerPoint 2010 and 2013 allow this option), password protecting your file etc. An interesting way to control tampering of your slides is to convert the slides as pictures.
While it is easy to convert slides as pictures, it is quite painful to insert those pictures back on to the slides and position them correctly. In this article, we will show you a surprisingly simple way to achieve this using Export option in PowerPoint versions 2013 and 2010.
Option 1: Save Directly As PowerPoint Picture Presentation:
Once your file is ready go to File -> Export -> Change File Type -> click on ‘PowerPoint Picture Presentation’.
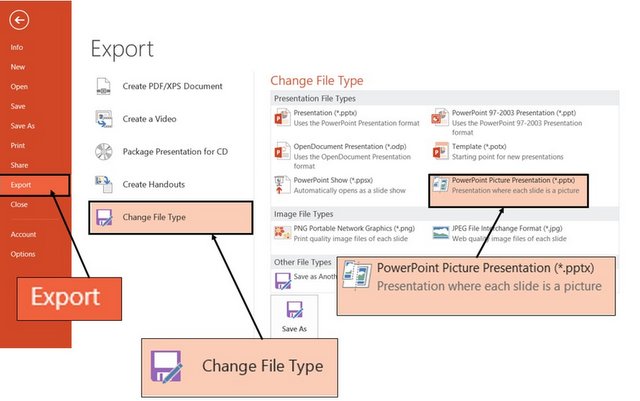 Save Presentation into Picture Slides
Then click on the ‘Save as’ button that takes you to the following dialog box where you can specify the location where you want to save your file. Save the presentation in the folder of your choice.
 PowerPoint File Save As option
Now, when you open the file, you will see that all the slides have been converted to pictures on separate slides.
Another way to convert your slides to pictures is to go with the option of ‘Save as Pictures’ and use the Photo album feature to stick them back on slides. Here is a step by step method of how to do it.
Option 2:
Step 1: Save your presentation slides as pictures
Let us take the following presentation to save as pictures:
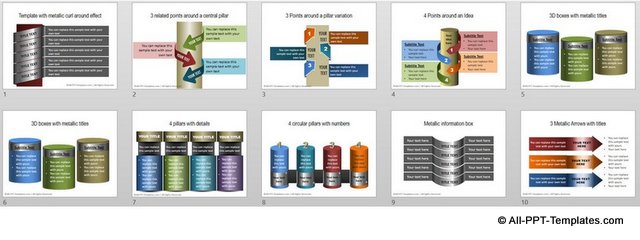 Slides from PowerPoint Infographics Pack
Go to File -> Save as -> Save as Type -> PNG Portable Network Graphics Format (*.png)
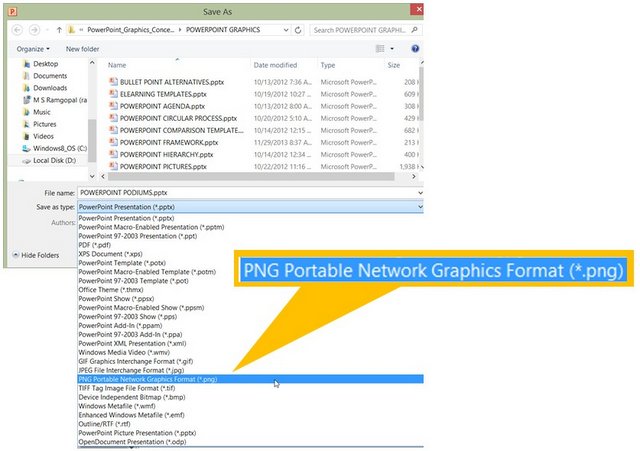 Save as PNG
You can choose the location to save the slides. In our case we chose to save them on the Desktop.
When you click OK a dialog box pops up asking if you want to save just the current slide or all slides as images:

Click on the option to export ‘Every slide’ in the presentation. This will lead to the following confirmation message:
 Every Slide in your presentation has been saved as a seperate file
PowerPoint converts every slide into a PNG
image and saves them all in one folder, in the location you indicated earlier. The name of the folder is the same as your original PowerPoint file.
 Folder with pictures
Inside the folder, you will see all the slides saved as pictures as follows:
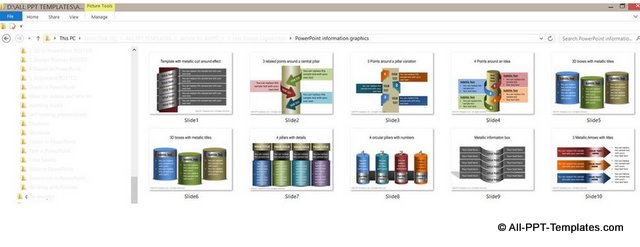 Contents of Picture Folder
Related: Adding Picture in Auto Shapes
Step 2: Putting the pictures back on to slides
It is surprisingly easy to put the slide pictures back onto slides. Go to Insert -> Photo Album -> New Photo Album as shown below:
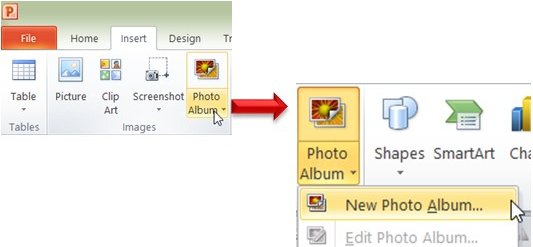 Create New Photo Album
When you click on the option, the following dialog box opens up:
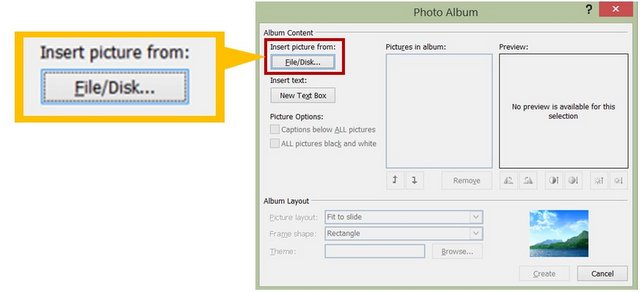 Insert Pictures from File to Create Photo Album
Click on Insert picture from ‘File/Disk’. In the dialog box that appears select all the pictures using ‘Ctrl+A’ shortcut and press ‘Insert’.
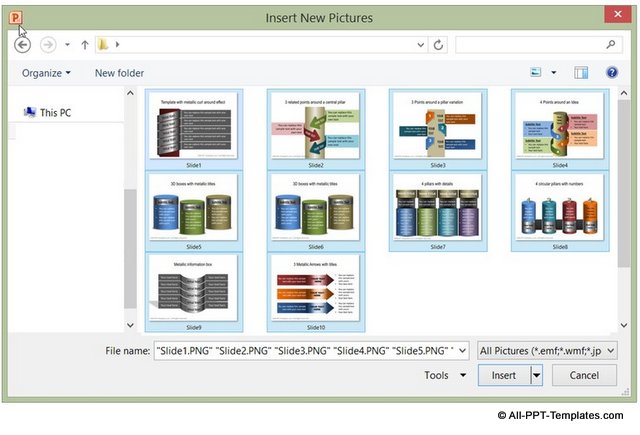 Photo Album Insert New Pictures
The following dialog box appears with options to:
- Save pictures in Black and White Mode
- Set Picture Layout to Fit Slide option
- Add a theme to the new presentation file
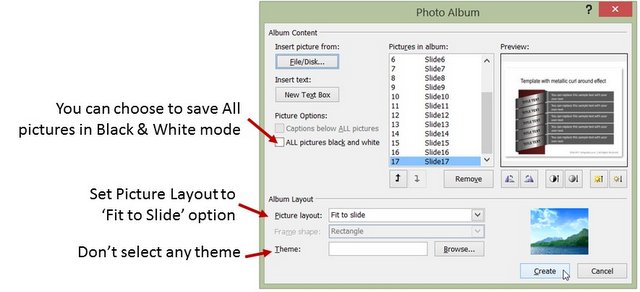 Photo Album Options
Don’t make any changes to the default selection and press the ‘Create’ button.
PowerPoint automatically inserts as many slides as there are pictures in the folder and inserts the pictures back onto slides. The first slide however is created as default title slide as shown here:
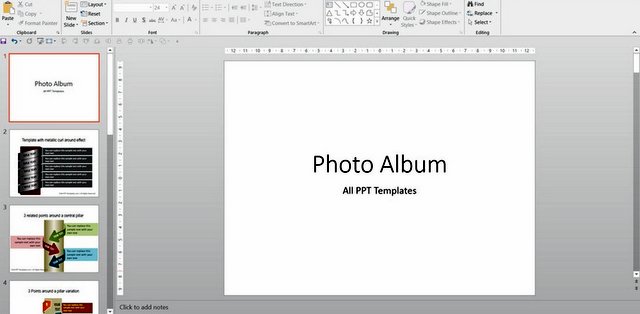 Final Picture Presentation
Delete the first slide and you have the new presentation with slide pictures. You can save them in a folder of your choice.
Why Use this Option Before Converting to PDF in PowerPoint 2007:
Unlike in PowerPoint 2010 and 2013, there is no option to save your presentation as PDF format in PowerPoint 2007. When you choose to convert your PowerPoint file to PDF file using online convertor options, all the 3D effects get lost in the output. In such cases, saving your slides as pictures and converting them into PDF is an elegant solution.
Quick Note: The Infographics templates showcased in this article are taken from our PowerPoint Infographics Pack. The pack has 600+ ready to use professional templates.
All the templates are 100% editable. Just choose the template that matches your thought and replace the sample text with your own text. Your business slides get ready in no time.
Why waste time creating your graphics and diagrams from scratch, when you have such an elegant solution available off the shelf?
We hope you found this article useful. If so, please share this article with your friends and leave your comments below
Related Posts
Top of Page : Presentation to Picture Slides
Main PowerPoint Tutorials Page

